How To Remove a Bidet: The Complete Guide
Are you concerned about the health implications brought by the continuous use of bidets and want to remove your fixture from your washroom? Or maybe, you want to relocate to a new neighborhood or remove your old unit and replace it with a new one? If so, how do you remove it?
You can remove a bidet by disconnecting the water supply lines and unbolting the unit from the floor. Next, you need to detach the bidet from the sealant by twisting the fixture until it comes off. Lastly, lift and shift your unit. If you’re worried about damaging your bidet, seek professional help.
Removing a bidet is a simple DIY project, but sometimes, it may require professional help, which can be expensive. In this article, I’ll go over the most important steps on how to remove a bidet, how to install a new one, and suitable bidet alternatives if you wish to stop using bidets altogether.
1. Check the Safety Precautions
Safety comes first in all DIY projects. Before you attempt to remove your current bidet, make sure you follow these safety precautions:
- Read the manufacturer’s instructions before you begin the process. This can help you identify any unique steps required to how to uninstall a bidet.
- Wearing gloves while removing the tiles and fixtures will protect your hands from small cuts and scrapes.
- Shut off the water supply before you remove the fixtures.
- If you’re removing a bidet with a dedicated electrical circuit, turn off the power at the breaker before you begin.
These precautions are important for keeping you safe and preventing damage to your home. Also, you’ll want to make sure you have the proper tools and supplies on hand. This way, you don’t end up wasting time running to the hardware store when you realize you don’t have what you need.
2. Turn Off the Water Supply
Before uninstalling your bidet, you need to turn off the water supply to the fixture (for standalone bidets) and the toilet (for toilet-mounted bidets). Unless necessary, avoid using metallic tools like wrenches to turn your shutoff valve, as these could cause damage to the retaining bolts and nuts when too much force is applied.
- First, locate the shutoff valve at the bottom of the unit.
- Rotate the shutoff valve clockwise.
- Flush your toilet and check whether water is still flowing into your toilet’s cistern.
- If it does, turn the shutoff valve fully clockwise.
Turning the water supply off ensures that the water doesn’t create challening conditions in which to work. Remember, cold and hot water supplies to the bidet may come in through separate lines; the cold water supply usually comes in from the base of the toilet, while the hot water supply may come in from below the sink.
3. Locate the Screws Holding the Bidet in Place
There are two main types of bidets; freestanding bidets and toilet-mounted bidets. Standalone bidets are independent units. On the other hand, a toilet-mounted bidet is an attachment that can be installed below your toilet seat.
Here are the tools you need to remove bidet toilet seat screws and bolts:
- Safety glasses
- Pliers
- Wrench
- Screwdriver (Phillips and flathead)
- Water bucket
In this section, we’ll explain how to unmount freestanding and toilet-mounted bidets.
How To Remove Freestanding Bidets
Once you’ve shut off the water, you must remove the hose that supplies water to the fixture. These hoses are usually held in place by tight nuts and bolts on both ends (on the wall side inlet and at the bidet inlet). Usually, these bolts can be removed by hand but can be loosened up with a pair of pliers.
Additional bolts or screws could be fastening the fixture to the floor. Locate these screws and use a screwdriver to remove the fixture from the floor.
How To Remove Toilet-Mounted Bidets
Toilet-mounted bidets are already installed on the toilet, and you can access the nuts and bolts holding them in place from underneath the toilet seat. As such, these bidets can only be removed by first uninstalling the toilet seat. Use an appropriate screwdriver to remove any screws holding the toilet seat in place.
If you cannot access the screws, they’re probably hidden from sight with plastic caps.
- Pop open the cap to reveal the screw.
- Use a screwdriver and plastic wrench to remove plastic screws, nuts, or bolts.
- Lift the toilet seat and uninstall the bidet.
Once the bidet is out, clean it with soap and water to suppress any pathogens that might still linger on the unit.
4. Break the Sealant
Leaking is a widespread problem that causes a myriad of issues, including:
- Costly water damage and repairs.
- Massive mold growth and damage.
- A surge in airborne allergens.
For these reasons, a sealant is applied to the base of the standalone bidet to prevent leaking. Sealants can be made of silicone, acrylic latex, and polyurethane, among other materials.
This seal keeps water from leaking from your bidet. It needs to be broken before you can uninstall the bidet. In most cases, rocking your bidet left, and right can help break this seal. If that doesn’t work, use a putty knife to get in between the sealant and the floor.
Lastly, hold the bidet with both hands and gently pull it forward from its mounting location. Standalone bidets are made of heavy porcelain, and you may need help removing your unit from its location.
5. Clean the Area
After years of use, there will be some dirt and gunk stuck underneath your bidet, usually near the seal (for freestanding bidets) and underneath the mounting bracket (for toilet-mounted bidets). Once you’ve removed the fixture, it’s time to clean up the area and make way for your new installation.
Here’s what you need to do:
- Sweep away any debris.
- Vacuum up any small pieces of tile that may have been broken in the process.
- Wipe down the area where your old fixture was mounted.
- Use a small amount of caulk to seal any gaps between the wall and your new fixtures.
If you’re disposing of your old bidet, you need to pay attention to any regulations presented by your state. This may include:
- Not placing your old bidet in the regular trash.
- Taking your old bidet to the nearest recycling center.
- Throwing your old bidet in your regular trash as long as you put it in a sealed bag.
Last but not least, turn the water back on and flush your toilet to ensure that it works fine.
Installing a Replacement Bidet
Did you uninstall your old bidet to replace it with a new one? Thankfully, installing a new replacement bidet is a super easy DIY project.
For this stage, you’ll need the following:
- A screwdriver
- Some cleaning agents (toilet cleaner, soap, or bleach)
- Rubber gloves
- Sponge
- A toilet brush
- A wrench
That said, here are a few steps to follow when installing a new bidet:
1. Clean Your Toilet (for Toilet-Mounted Bidets)
Cleaning your toilet removes any pathogens that could risk your health. Since you’ll be working up close on your toilet, we recommend thoroughly cleaning the bowl and toilet seat.
Below is a good process to follow:
- Start by cleaning the toilet bowl. Apply your toilet cleaning agent around the bowl, and get in the rim jets.
- If the toilet cleaning solution is unavailable, you can use half a cup of bleach instead.
- Using a toilet brush, scrub every inch of the toilet bowl and leave for five to ten minutes for the toilet cleaner to disinfect the toilet bowl.
- Flush the toilet.
- Next, you want to disinfect the toilet by spraying disinfectant on the exterior. Focus on both sides of the toilet seat and wait for 10 minutes to let the disinfectant dry.
- Use a clean, dry sponge to wipe the toilet clean.
Cleaning your toilet once a week should be incorporated into your monthly routine to minimize the risks of getting infected by using a toilet that’s infected.
2. Turn Off the Water Supply
Your new bidet will be hooked to the toilet’s main water supply.
- Shut off the water at the main shutoff valve that goes into the toilet.
- Flush your toilet to drain the water from the tank.
- Unthread the supply line going into the toilet’s fill valve. Clean off any residual water that pours down from the tank with a dry sponge.
Later on, when the new bidet has been installed, you’ll need to reconnect the water supply and divert water to the bidet. For this, you may get additional accessories depending on the manufacturer. For instance, most manufacturers will provide a T-valve with the fixture to direct water to the bidet.
You’ll need to insert a rubber gasket into the T-valve to get a leak-free seal. Next, thread the T-valve into the toilet’s fill valve. Connect the main water supply to the bottom of the T-valve and connect the provided supply hose to the bidet.
Tighten the water supply hoses with a wrench to prevent unwanted water leaks.
3. Remove the Toilet Seat
The toilet seat is secured by two mounting screws held on the back of the seat, right below the tank.
Here’s how to remove the toilet seat:
- Pop open the plastic caps to gain access to the screws. For stubborn caps, insert a small screwdriver into the cap groove and gently pry it open.
- Modern toilet seats are usually held in place by plastic bolts and nuts, so be sure not to apply too much force to these plastic parts since they could break easily.
- Use a slightly larger screwdriver to unscrew any screwdrivers holding the toilet seat in place. Your toilet could have a tightened nut holding the screw from underneath the toilet bowl. Using tongue-and-groove pliers, hold the nut in place as you unscrew the seat.
Unfortunately, some nuts just won’t budge, no matter how much force you apply. In that case, you may need to cut the bolt and seek replacement parts.
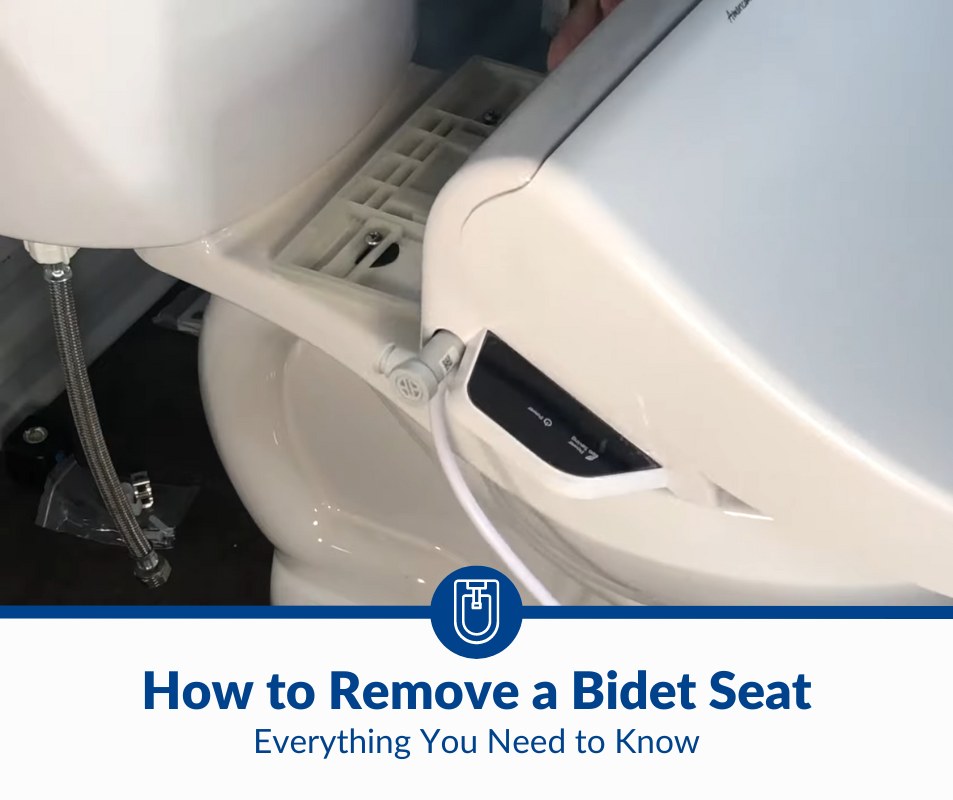
4. Align Your Bidet
Unwrap your new bidet and place it on the toilet bowl mounting holes for your toilet seat. Some bidets come with rubber grommets that can be inserted into the toilet seat mounting holes. Your bidet may also come with an adjustable mounting bracket, adjusting plates, and a paper template that allows you to align the fixture into position.
When satisfied with the location of the bidet, install your toilet seat directly above the bidet and secure it in place with the mounting screws.
Lastly, turn the water back on and inspect your toilet for any leaks. Test your bidet by putting your hand over the water spout and turning the water on. A soft stream of water should come off the fixture.
Best Alternatives for Bidet
Although bidets are great for hygiene, they can raise your water bill. On average, a single flush cycle in a modern toilet drains approximately 1.6 gallons (6.1 liters). Bidets consume an eighth of a gallon (0.47 liters) every time they’re used. Combined, the whole toilet fixture drains a significant amount of water.
On top of that, bidets can take some time to get used to and take up more space in an already congested bathroom.
If you decide to do away with your bidet permanently, what are the next best alternatives?
1. Handheld Sprayers
Handheld sprayers are essentially water jets that can be pointed toward your bottom for cleaning. Unlike ordinary bidets, handheld sprayers offer much more flexibility in that they come with a flexible hose that enables you to aim where you’d want the water to go (front or back).
Moreover, handheld sprayers don’t take up as much space as bidets. You can hook the supply hose to the main supply or the toilet tank. They’re easy to install, have multipurpose uses (for cleaning pets, can be used as a cloth diaper sprayer and toilet washer), and, best of all, pack suitable water pressure to clean fecal matter without using your hands.
On the downside, you’ll still need to wipe dry with toilet paper. What’s more, handheld sprayers are not the neatest bidet alternatives. However, they’re much cheaper than an ordinary bidet.
2. Wet Wipes
Wet wipes beat dry toilet paper in almost every aspect of hygiene, effectiveness, and comfort. If you’re not ready to go back to bidets and other water-based cleaning methods, wet wipes are a much better option to consider.
Wet wipes are dipped in mild detergent and fragrance, cleansing solution, and water. They’re cheap and just as effective as bidets.
On the downside, most wet wipes in the market have been misrepresented as “flushable” when they are not in the real sense. Therefore, we recommend not flushing the wet wipes down your septic tank since they could lead to blockage. Additionally, wet wipes are not the most suitable option to rely on since their cost outweighs the cost of a bidet in the long run.
3. Portable Squeeze Bottle
Portable squeeze bottles come in all shapes and sizes, but essentially, they can be carried around, unlike your toilet-mounted bidet. They’re easy to carry due to their small size. They’re cheap and easy to maintain since they do not have many moving parts. Portable squeeze bottles can also carry warm water, which relieves hemorrhoids.
Unfortunately, portable squeeze bottles can only hold little water at a go. As such, they need to be refilled every time they’re used. But due to their simple design, you can place the spout closer to the soiled area and control the amount of water that spurts out.
4. Switch to a Camping Bidet
Are you always on the move and need to carry your bidet with you? A camping bidet like the KEDSUM Portable Camp Shower (available on Amazon.com) is what you need. These devices are larger than bottle-sized portable bidets but smaller than freestanding bidets. What you’ll love about them is the zero need for installation. All you have to do is insert the hose in a bucket of water and turn on the motor to activate the spray.
Camping bidets are battery-powered and can run for at least 60 minutes on a single charge, depending on the make. They also offer multipurpose functionality for travelers looking for a camp shower and a bidet all-in-one. On the downside, they require more storage space and are prone to leaking when not installed correctly.
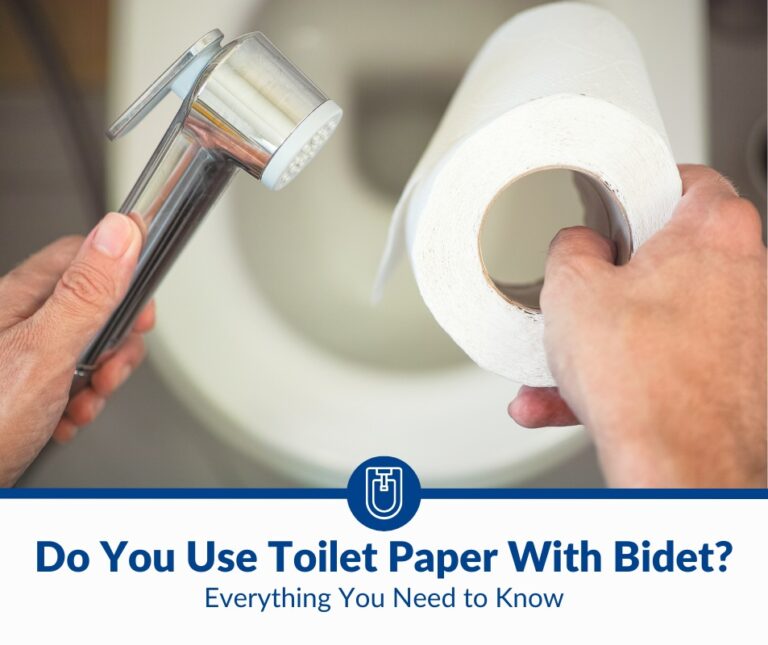
5. Toilet Paper
Good old toilet paper is still worth your consideration if nothing else works for you. Dry toilet paper is cheaper than moist wipes. Disposable tissue paper reduces the risk of contact with waste and, best of all, can be used in areas with limited access to clean water. Unlike wet wipes, tissue paper does not wreak havoc on your plumbing. It’s easy to dispose of since it is made of thin paper that easily passes through your pipes.
On the flip side, toilet paper will offer a much less effective wipe than wet wipes. Additionally, some people get irritated by the dyes, perfumes, chlorine, and other chemicals used to manufacture toilet paper. Last but not least, toilet paper leads to the destruction of trees in its making, which is not good for the environment.
Conclusion
Removing a bidet completely or for replacement doesn’t have to be more complicated than it appears. The tips highlighted in this article will help you avoid unnecessary headaches and make the removal process as smooth as possible. If you’re having trouble uninstalling your fixture, get in touch with an expert for professional help!