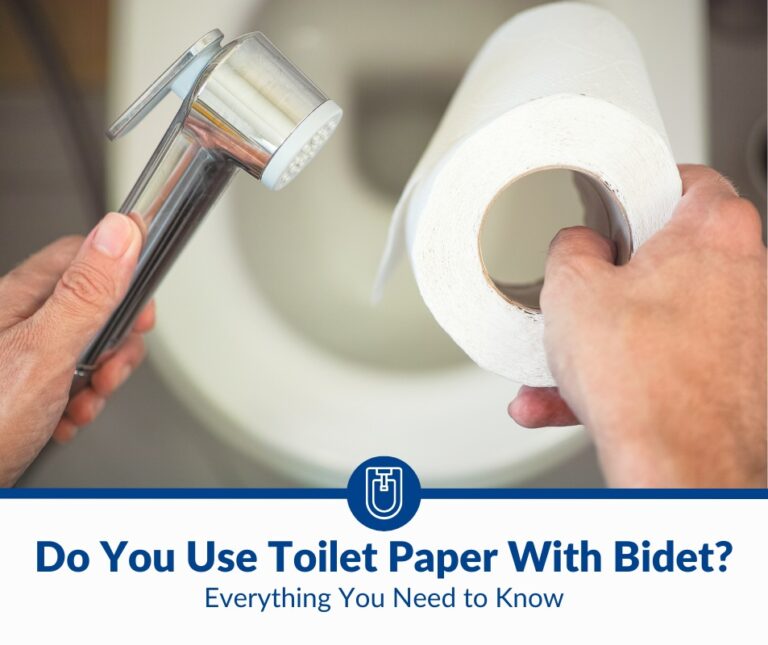
How To Install a Bidet Attachment: The Complete Guide
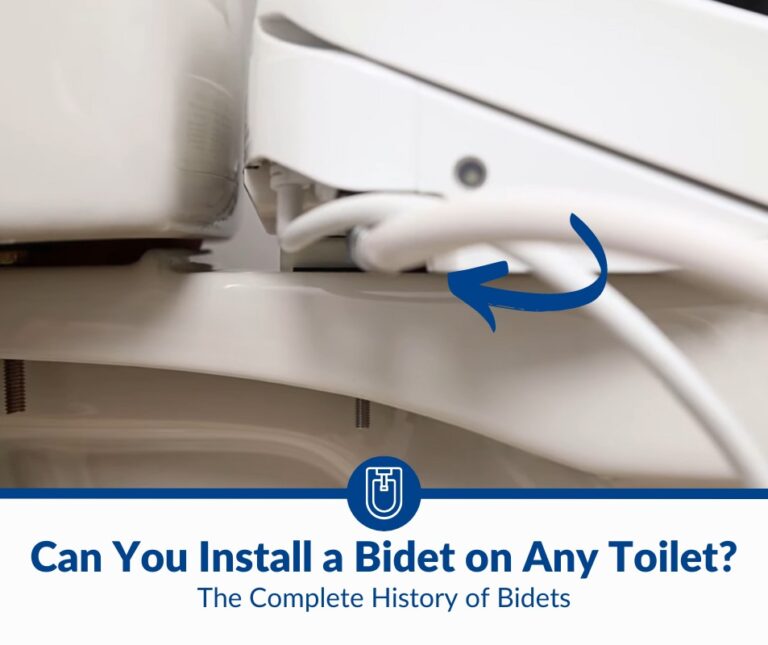
Modern bidets as toilet attachments are broadly classified into these three types: seat, console, and handheld sprayer. All bidet attachments require a water connection, but the specific steps of installation will depend on the model you buy or have and your toilet configuration, style, or type.
Install a handheld bidet attachment by connecting it to the toilet tank’s hose or the water supply shut-off valve. Mount the sprayer on the wall or hook it to the tank. Install a bidet seat or console with one or two water lines by mounting the attachment on a toilet bowl.
If you have a standard two-piece toilet with a detached tank and flexible hose, the installation is likely to be a cakewalk. One-piece skirted toilets with inaccessible tank inlets and rigid pipes as the supply lines call for some modification. Read on to learn how to install a bidet attachment.
1. Ensure You Have Compatible Fittings
All bidet attachments use a few standard fittings, mostly adapters, to connect to the water line in your toilet. A bidet attachment that uses both cool and warm water connections will use the lines from your sink and toilet tank. So, you need compatible connectors for your plumbing and toilet.
Skip to step 2 below if you already know that the fittings are compatible and you have your bidet attachment ready for installation. Else, note the following compatibility issues that may pop up in some cases, especially if you don’t have standard plumbing or toilets and are yet to buy a bidet.
Suppose you have a handheld sprayer as the bidet attachment for your toilet. This type of bidet attachment can use a toilet’s flexible tank hose, in which case the T-adapter will be the standard connector or diverter with the following bore sizes:
- 1/2-inch (1.27 cm) outlet for the handheld sprayer’s hose
- 7/8-inch (2.22 cm) inlet (external diameter) for the flexible tank hose
- 7/8-inch (2.22 cm) outlet (internal diameter) for the tank’s ballcock fitting
However, this T-adapter won’t work if you have to use it at the toilet’s water shut-off valve, which is necessary if you have an inaccessible tank hose or inlet. Such connections require a diverter and a flexible hose for your toilet tank. The adapter must have these bore diameters:
- 3/8-inch (0.95 cm) inlet for the water shut-off valve
- 3/8-inch (0.95 cm) outlet for the tank’s flexible hose
- 1/2-inch (1.27 cm) outlet on the side for the bidet attachment
You will need such a setup if you have a one-piece skirted toilet that is installed flush to the wall, so the tank’s inlet or hose connector may not be readily accessible. Plus, if your plumbing is unique or you live in an area that has different standards, choose these fittings accordingly.
For instance, some water supply shut-off valves require a 1/2-inch compression fitting instead of the 3/8-inch bore of the standard T-adapter. A similar modification may also be necessary if you have a bidet attachment that connects to a 1/2-inch warm water supply line of the sink.
These variations won’t be a concern if you have standard plumbing and two-piece toilets with an accessible and flexible tank hose. If you have a bidet attachment other than a handheld sprayer, such as consoles or seats, these use similar water connection adapters or diverters.
However, you must ensure that the bidet console or seat is compatible with your toilet, be it the configuration, i.e., two-piece, French curve, etc., or the fittings, such as the nuts and screws you will use to mount and install the attachment on the bowl.
Some two-piece skirted toilets and those with top-mounted seats may require longer screws to attach a bidet console or seat. A French curve one-piece toilet requires bidet consoles or seats that are compatible with the concave design, but this doesn’t apply to handheld sprayers.
2. Prepare Your Toilet for the Installation
Installing a hand sprayer is simpler than mounting other bidet attachments, and there’s almost no prep necessary. All you have to do is close the water supply shut-off valve that you will use to install the handheld sprayer, whether it is the one for the toilet tank or your sink.
If you use the toilet’s supply line, close the shut-off valve, and empty the tank before proceeding. This is necessary regardless of where you connect the handheld sprayer’s adapter and hose, at the tank inlet or the supply line. Emptying the tank isn’t required if you use the sink’s water line.
Bidet consoles and seats have a few extra steps to prepare the toilet and install the attachment. Here’s the typical drill:
- Close the water supply shut-off valve for the toilet. You must also close the shut-off valve for the hot supply line to your sink if your bidet attachment has a warm water inlet.
- Clean the toilet, including the bowl, lid, and seat. You can remove the toilet seat and clean it separately. If your bidet attachment is a full seat with a lid, decide whether or not you want to clean the old one, but the bowl might still require some cleansing.
- Remove the toilet seat by unscrewing it from the mount holes in the bowl. You will need to flip the plastic caps or covers at the back to access the screws. Some seats use quick-release mechanisms, so look for and use the locking knobs or release tabs.
- Keep the screws, including the bolts or nuts, as you’ll need them to install a bidet console, not a full seat. A bidet seat will include a mounting plate, bolts, and screws, but keep the old fittings anyway. You will need those if you ever reuse the old toilet seat.
- Get the bidet attachment kit and tools, such as a flathead or Phillips screwdriver and an adjustable wrench. You will also need a towel or a vessel to collect any water that may drip from the toilet hose and sink line when you remove them in the next steps.
3. Set Up the Bidet’s Water Connections
A handheld sprayer with only a cool water line will require one water connection, but any bidet attachment that also uses warm water needs two inlets. The specific steps to set up the water connection for a bidet attachment depend on the supply line and point you use for the adapter.
1. Use an Adapter or T-Connector Below the Tank
You can use the adapter or T-connector included in your bidet attachment kit below the tank if the hose is flexible and the inlet is accessible. This applies to all styles, such as:
- A bidet console attachment
- A bidet handheld sprayer
- A full bidet seat with a lid
Here are the steps after you close the water supply line and empty the tank:
- Place the towel or vessel under the tank hose so that you don’t have water dripping through the inlet after you unscrew the connector.
- Unscrew the wingnut on the tank inlet and remove the ballcock fitting of the hose.
- Take the T-adapter or diverter from the bidet attachment kit, and screw it into the hose using the threaded male port.
- Fit the female threaded port to the tank inlet and screw it in while aligning the side outlet for the hose of the bidet attachment.
- You may have to adjust the wingnut of the tank inlet or the ballcock fitting of the adapter to ensure the side outlet faces outward.
Ensure that the T-connector is fitted snugly. If you can’t screw in the fitting fully, the threaded female or male ports are probably misaligned or not completely straight. You don’t have to overtighten threaded fittings. Also, ensure the rubber washers are inside before installing.
2. Use an Adapter or Diverter at the Shut-Off Valve
You can use a T-adapter or diverter to connect a bidet attachment to the water supply line at the shut-off valve. But this connector is different from the adapters with male and female ballcock fittings on both ends, apart from the threaded outlet for the bidet attachment’s hose to the side.
Here are the steps after you close the water supply line and empty the tank:
- Unscrew the threaded nut of the toilet tank hose to remove it from the supply line.
- Get the compatible adapter or T-connector, and fit it snugly at the shut-off valve.
- Use the other compression fitting to connect the flexible toilet tank hose.
- Align the adapter to have the side diverter facing toward the bidet toilet.
You can use your fingers or a wrench to tighten these fittings, but don’t overtighten. These steps won’t work for rigid pipes connecting the water supply line to a toilet tank. You must replace hard pipes with a braided and flexible steel hose, and then you can install the T-adapter for the bidet.
3. Use an Adapter or Connector for the Sink’s Line
Suppose you can’t use the toilet’s supply line for the bidet attachment, whether at the tank inlet or the shut-off valve. The reason could be one or more of the following:
- An inaccessible tank inlet
- Hard pipe as the supply line
- Tankless or concealed tanks
- Toilets with flushometers
In such scenarios, you can connect the bidet attachment to the cool water line of the sink. But you will need a longer hose for the bidet attachment. The standard ones included in most kits may be too short for the distance between your sink and toilet.
Also, you can’t use the standard T-adapter for the toilet tank hose with the supply line of the sink. You will need the T-adapter that works with the shut-off valve of the sink or toilet. However, you will still need a flexible hose if the sink has a hard pipe connected to the supply line.
4. Use the Sink’s Warm Water Line for the Bidet
All bidet attachments require a cool or regular water line, but many also use a second hose for a warm jet stream. Some bidet attachments, whether handheld sprayers or seats, have a mixer to regulate the flow of cool and warm water for the desired temperature control.
You can use your toilet basin or sink’s warm water line for a bidet attachment like the Sneatup Bidet Sprayer Set (available on Amazon.com). This kit includes the following components:
- Bidet sprayer head
- Bidet sprayer holder
- Brass mixing valve
- 78 inches (198 cm) hot water tube
- 48 inches (122 cm) bidet sprayer hose
- 3/8 brass T-adapter (diverter)
The solid brass mixing valve also serves as the adapter for the tank hose and the connector for the hot water tube from the sink. You must use the 3/8 T-adapter at the sink’s hot water line after turning off the supply valve. Plus, the Sneatup kit includes the following parts:
- Rubber washers
- Screws
- Teflon tape
4. Connect the Bidet Attachment’s Hose(s)
If you have the likes of Purrfect Zone’s Bidet Sprayer for Toilet (available on Amazon.com), you have only one hose that will connect to the threaded male connector to the side of the adapter at the supply shut-off valve or under the tank. Simply screw in the threaded ends to the adapter and the handheld sprayer.
Always check if the rubber washers are in these adapters and hoses before you fit them snugly. If you have a Sneatup kit or the Natico Handheld Sprayer for Toilet (available on Amazon.com), connect the cool and warm water hoses to the respective adapters and then to the spray head.
The same methods apply to bidet console attachments and seats. If you have a Tushy Spa 3.0 Bidet Attachment (available on Amazon.com), you will connect the cool and warm water hoses to the respective inlets under the console before mounting it on the toilet bowl.
The hoses aren’t always braided steel. For instance, the Sneatup and Natico handheld sprayers have anti-burst steel hoses for both hot water connections and the spray head. But Tushy’s Spa bidet has a polyurethane tube for the hot water line, while the cool water hose is stainless steel.
Furthermore, connecting the hoses or tubes to a bidet attachment isn’t an identical process. A bidet console or seat will likely have threaded fittings toward the side, whether under or outside, for the hose connections. A hand sprayer has a threaded port at the base of the spray head.
All such hose connections are a simple and turnkey installation because bidet attachment kits have compatible components.
5. Hook a Sprayer Attachment to the Tank
After you install all the fittings of a handheld sprayer, you can mount this bidet attachment in two ways. The easier option is to simply hang the spray head on the edge of the toilet tank using the holder in the kit. Alternatively, you can mount the holder on the wall by drilling a small hole.
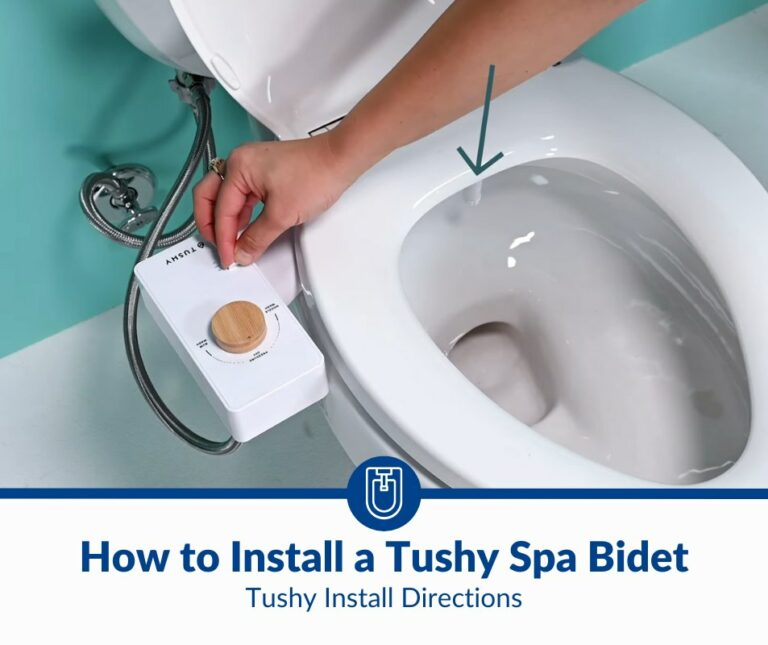
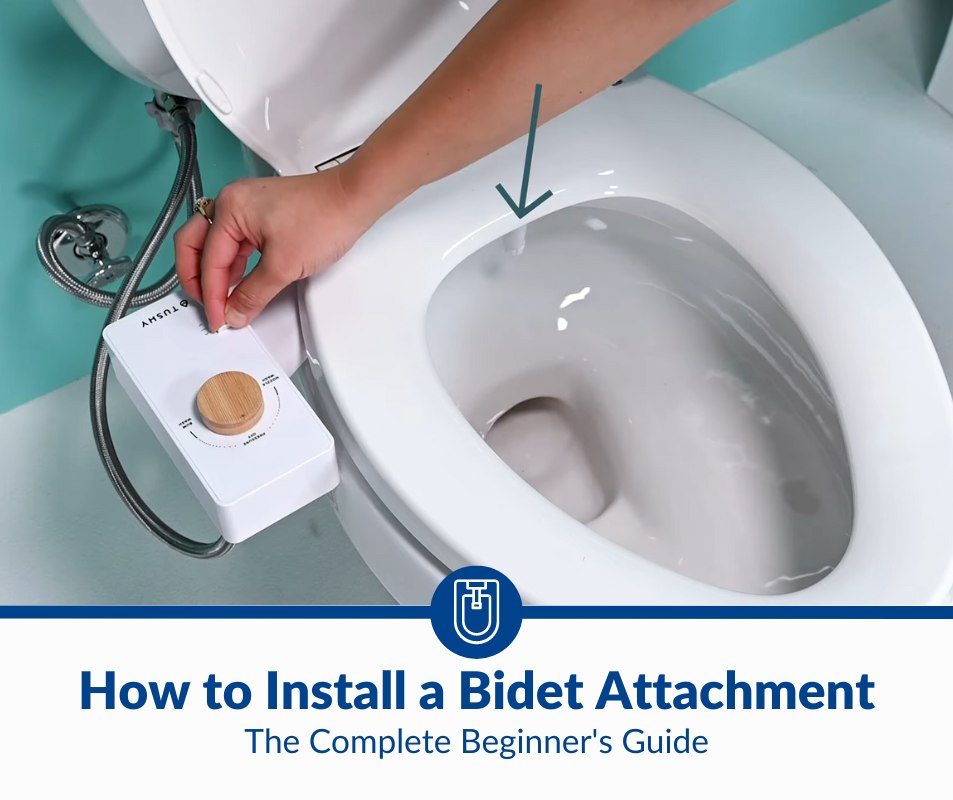
6. Install a Bidet Console Under the Seat
Installing a bidet console attachment requires you to remove the toilet seat, as I have explained in step 2 above. Here are the steps to attach and install a bidet console under a toilet seat:
- With all the hoses fitted to the console, place the bidet attachment on the toilet bowl.
- Place the washers in the kit on the mount holes and align the bidet attachment/console.
- Adjust the plates or sliders, depending on the model, over the mount holes of the bowl.
- Once aligned, place the toilet seat atop the bidet attachment and secure the assembly.
- Get the toilet seat screws, nuts, and bolts to fasten the entire assembly on the bowl.
Suppose your toilet seat uses top-mounted screws or a quick-release mechanism with metal or plastic pins. In such a scenario, you must adjust the plates or sliders with the mount holes and the raised pins, as well as the locking knobs or tabs.
7. Mount a Bidet Seat on the Toilet Bowl
A bidet seat doesn’t sit under the one you have on your toilet. It replaces the old toilet seat. So, you don’t need the current seat or its fittings. But the adapters and hose connections have the same or similar installation methods, as I have explained above.
Suppose you have an attachment like the Brondell Swash Ecoseat Bidet Toilet Seat. Connect the hose to the adapter fitted to the tank, remove the toilet seat, and follow these steps to mount a Brondell or similar bidet attachment on the bowl:
- Take the mounting plate in the kit and place it on the bolt holes of your toilet bowl.
- Get the two adjustable brackets from the kit and place them inside the mounting plate.
- Align the adjustable brackets and the mounting plate with the bolt holes of the toilet.
- Slide the mounting bolts through the two holes and fit the washers and nuts (in the kit).
- Tighten the nuts with the bolts to some extent to secure the mounting plate assembly.
- Connect the hose to the bidet seat and place it on the mount plate attached to the bowl.
- Slide the bidet seat backward or forward for a flawless alignment with your toilet bowl.
- If the seat is misaligned, adjust the brackets in the mounting plate to fix the problem.
- Tighten the nuts after you are happy with the alignment to complete the installation.
- Turn on the water supply shut-off valve and wait for a few minutes to check for leaks.
8. Power an Electrical or Electronic Bidet
A bidet attachment with a heated seat or built-in water heater and warm air dryer require a power source. Electronic features, such as sensors and remotes, may work on batteries, and they could be included in the kit. But a power source is imperative for heating functions.
For example, Toto’s Washlet C5 Bidet Toilet Seat (available on Amazon.com) requires a 120V GFCI receptacle within 3.9 feet (1.18 meters). The power cord may be shorter in some models. The Toto Washlet E200 (available on Amazon.com) has a 3 feet (0.91 m) power cord. If you have a wall receptacle ready, this setup is plug-and-play.
Final Thoughts
Installing most bidet attachments is a turnkey process for standard toilets and plumbing fixtures. But the configuration, design, and plumbing system of some toilets may pose a challenge, which can be managed, of course, with compatible adapters and fittings to circumvent the hurdles.