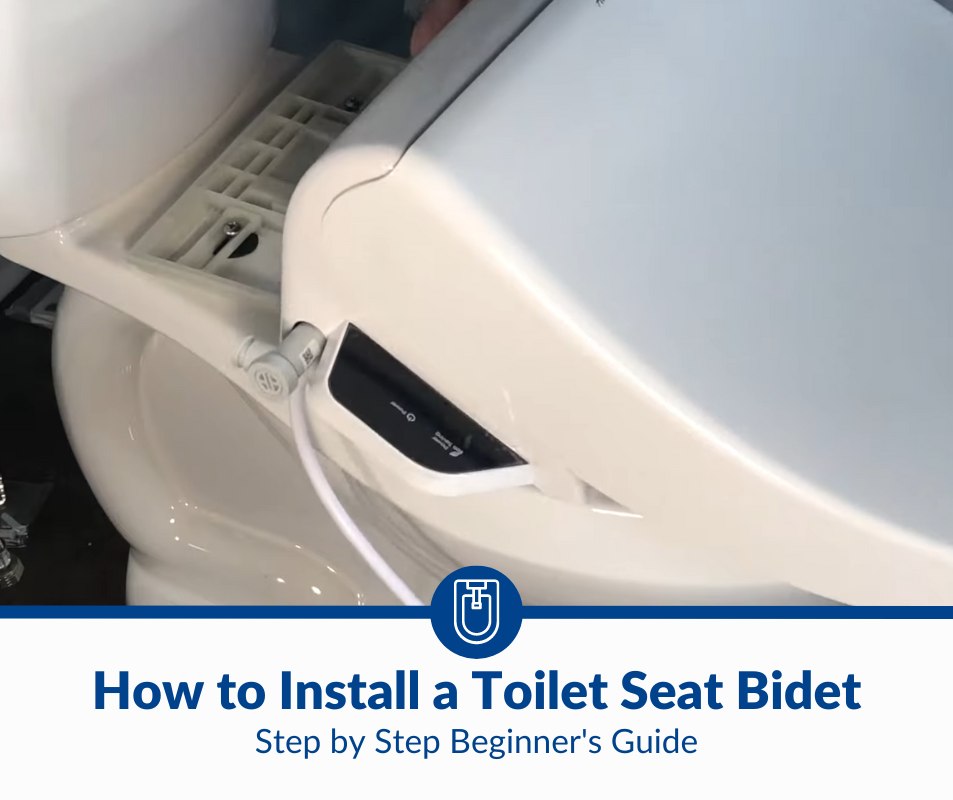
How To Install a Toilet Seat Bidet: Step by Step Guide
Many Americans are converting to bidet toilet seats, drawn by benefits such as refreshing cleaning of the butts and savings on toilet paper purchases. If you have decided to go bidet in your bathroom, you’d want to know how to install it properly.
To install a bidet toilet seat, you need to remove the existing toilet seat to make room for the bidet unit. The tools you need are at least a wrench and a flathead screwdriver. Ensure your bidet seat is compatible with your toilet type, especially if you have a skirted toilet.
If you can’t wait for the bidet experience, I’m here to help you install your toilet seat bidet properly. This step-by-step guide will help you install your bidet seat easily and quickly while avoiding the common mistakes others make.
1. Get the Right Bidet Seat for Your Toilet
Toilet shapes vary, so ensure you have the right bidet seat for your toilet. The common toilet shape types are round and elongated.
Another variation is that some toilets are two-piece with the tank and the bowl as separate units. Others are one-piece designs with the tank and the bowl consolidated into a single unit. The one-piece unit is also called a skirted toilet.
Most homes have the elongated, two-piece toilet variety. The round shape toilet is common in small bathrooms, and the one-piece type is modern. Just check to be sure you ordered the right bidet.
If you have the one-piece or skirted toilet type, here’re a few things to keep in mind when selecting a bidet seat:
- Flat bowl and curved bowl varieties: A one-piece toilet may have a flat bowl that meets the tank at about a 90-degree angle. Some skirted toilets have curved or sloped bowls.
- Limited bidet seat selection for the curved type: You may have a limited bidet seat selection if you have a skirted toilet with a slanting bowl. The sloping bowl on these toilets is called the “French curve.”
- Look for a suitable bidet seat for the French curved skirted toilet: A few bidet manufacturers have special designs for toilets with sloped bowls. You may need to replace your curved, skirted toilet if you can’t find a suitable bidet seat.
Here’s how to know if you have the right bidet seat:
- Measure the distance between the toilet tank and the center of the bolts on the toilet seat. If you have a standard toilet, that distance should be at least one inch (2.54cm).
- Also, measure the gap between the bolts. It should be at least 5 inches (12.7cm). Some bolts may be up to 8 inches (20.3 cm) apart.
Check to see if those measurements align with your bidet seat. You can use the measurements to order the right bidet seat if you don’t have it already, or if the bidet you have now isn’t suitable for the toilet.
I recommend the BidetMate 2000 Series Electric Bidet on Amazon. It has a long warranty period and an energy-saving mode to cut your power bill. Plus, the manufacturer donates a fraction of the money you pay for the product to environmental causes.
2. Check if You Have All the Bidet Seat Installation Components
Your bidet package should arrive with all the parts you need for the installation. Inspect the package to be sure you have everything. You should see the following items for a standard installation:
- Bidet seat unit
- Mounting plate or brackets
- Bidet water supply hose
- T-valve
- Bolts and nuts
- Control panel or remote
You may have additional components depending on the bidet type and brand.
3. Turn Off the Water Supply
Reach for the valve that supplies water to the toilet tank and shut it off. Next, flush the toilet.
The installation involves detaching the hose that sends water to the toilet tank. You could have messy flooding in the bathroom if you detach the hose before shutting off the valve on the wall or floor and emptying the toilet tank.
4. Remove the Existing Toilet Seat
The bidet seat will replace your current toilet seat. As a result, the existing toilet seat should give way.
With a wrench, remove the nuts and bolts holding the seat in its place. Sometimes, you’ll need a flat screwdriver to remove the screws holding the current toilet seat.
You should only use hand tools for this operation because a drill could break the bolts or screws.
Take out the seat and clean the mounting area.
5. Attach the Bidet Mounting Plate to the Toilet
Place the bidet mounting plate over the bolt holes in the toilet bowl. If brackets are provided, insert them, ensuring they align with the bolt holes.
Secure the mounting plate in place with the mounting bolts. The bolts should be inserted through the brackets and tightened into place.
The bolts holding the toilet seat and the lid are hidden if you have the skirted toilet type. As a result, you’ll need to find a workaround to tighten the mounting plate to the toilet bowl.
You’ll need to obtain top mounting bolts specially designed for top mount installation. These bolts have a rubber plug that you insert into the holes in the bowl.
Once the rubber plugs are in place, place the mounting plate onto the toilet bowl and fasten it with the bolts. Many bidet models come with top-mount hardware.
The mounting plate should have adjustment space to allow you to align the bidet seat properly. For example, you want to ensure that the seat and toilet bowl rims align.
6. Install the Bidet Toilet Seat
Slide the bidet seat onto the mounting plate. The seat has hooks that clip into the hooks on the mounting plate. You should hear a click if the bidet seat is inserted correctly.
If the bidet didn’t install well, press and hold the button on the side of the seat and pull it out gently. That will allow you to adjust and align the mounting plate for the desired positioning.
Besides aligning the seat’s rim to the bowl, make sure that the seat stays in place. If it shifts around, that’s a sign that something isn’t right in the setup. A shifting bidet seat can get damaged or cause accidents in the bathroom.
The problem may be a loose mounting plate. Check for loose bolts and fasten them more tightly to keep the bidet seat in place.
7. Connect the Bidet’s Water Supply Hose
Detach the toilet’s water supply hose from the toilet tank’s fill valve. You may need a wrench to unscrew the hose. Expect some water drips when you detach that hose.
Screw the T-shaped branch valve that came in the bidet package to the toilet tank. Connect it where you detached the fill valve. The T-shaped valve splits the water supply to allow you to direct water to the toilet tank and the bidet unit.
Reconnect the water supply hose to the bottom of the T-valve.
With skirted toilets, the fill valve connecting to the toilet tank may be hidden or difficult to reach and remove.
In that case, use an alternative T-valve for skirted toilets. Instead of connecting to the tank’s fill valve, this alternative T-valve connects to the shut-off valve on the wall or floor.
Sometimes, you may need an additional adapter to make a proper T-valve connection at the shut-off valve.
Screw one end of the bidet inlet hose to the side of the T-valve. Screw the other end of the bidet hose onto the bidet seat. Depending on the bidet model or brand you have, one end of the hose may already be fixed to the bidet seat. As a result, you’d only need to connect the loose end of the hose to the T-valve.
Tighten the connections to secure them into place and prevent leaks.
8. Install Inline Water Filters
Although an inline water filter for the bidet seat is optional, you should consider it. Installing water filters can extend your bidet’s lifespan, saving money and protecting the environment because you won’t need to replace the unit frequently.
A filter will prevent water sediments, such as sand particles, from reaching the bidet. An accumulation of sand or other particles in the bidet unit can damage its internal structure.
Moreover, the particles can clog the unit’s water outlets and make it less effective in performing its functions.
Other filters can prevent the growth of bacteria in the bidet unit. A buildup of bacteria can interfere with the unit’s working or compromise the system’s water quality.
While the bidet will work just fine without a water filter, you should consider installing one if your water supply pipes are old or the bathroom runs on well water.
If you feel a water filter is great for your bidet, I recommend the GLACIER FRESH RV/Marine Water Filter on Amazon. This versatile device is durable, has a large capacity, and fits any standard hose.
How To Connect a Bidet Toilet Seat Water Filter
Bidet toilet seat water filters are easy to install. The first step is to close the shut-off valve. Next, determine where you want to place the filter.
- You can connect the water filter to the T-valve side that directs water to the bidet. While most filters will fit in this position without problems, you may need an adapter in some cases.
- Alternatively, you can install the filter on the shut-off valve. The filter will serve the bidet and the main toilet tank in this position.
How To Prevent Bidet Water Filter Leaks
Open the shut-off valve slowly once the filter is securely in its place.
- Check the connections around the valve for leaks. If you notice leaks, tighten the connection screws with a wrench.
- If the leaks persist, close the water supply and detach the filter. Put a plumber’s tape on the connection threads and screw the filter back in place. Turn on the shut-off valve back. There should be no more leaks.
Close the water supply valve again to progress to the next step of installation.
A great water filter can last up to 6 months. Remember to replace the filter after it runs its life to maintain great water quality for your bidet.
9. Connect the Bidet to the Power
If you have an electric bidet, you’ll need a power outlet in the bathroom.
Your electronic bidet seat should come with a power cord attached to it on the side. Plug the cord into your bathroom’s electricity outlet. If the cord can’t reach the outlet, use an extension cord to get it there.
Here’re a few things to keep in mind when connecting the electric bidet seat to power:
Connect to a GFCI-Protected Outlet
Make sure you plug the power cord into the ground fault circuit interrupter (GFCI) outlet. The GFCI can detect current leaks and trip the circuit to cut off electricity. That measure enhances your safety by shielding you from major electrical shocks.
If you have an old bathroom, you may want to consult a professional to know if its outlet is GFCI-enabled. While the bidet would still work when plugged into non-GFCI outlets, you should consider upgrading to a GFCI-protected outlet.
Bathroom Outlet Should Deliver Enough Power
Electric bidet seats may have different electricity requirements.
The GFCI power outlet should deliver at least 15 amps of electricity for the bidet unit to operate properly.
The bidet with the reservoir tank can draw up to 600 watts when running at peak temperatures. The tankless variety can draw up to 1,400 watts at the maximum temperature.
The bidet seat type with a tank heats water in the reservoir and stores it at your desired temperature. It will draw water from the heated tank during the wash. The warm water delivery lasts about 30 seconds before it begins to cool.
On the other hand, the tankless bidet heats water on-demand as it passes through the bidet seat inlet into the spray nozzle. You may wait a few seconds before the warm water comes out, but the supply continues as long as you need it.
Place the Power Outlet in the Right Place
Most bidets have the power cord coming out on the right-hand side when you’re facing the toilet seat. Other models have the cord on the left side.
The bidet power cord is usually 4 feet long. As a result, it may not reach a far-placed electric outlet. Therefore, ensure you install the bathroom power outlet in the correct place.
Placing the outlet on the wall behind the toilet may be ideal for both left and right-sided bidet power cord locations.
Use Outdoor-Rated Extension Cord
Regardless of the unit’s power cord position, you can work around the problem with an extension cord. Ensure you use an outdoor-rated extension cord for this task. An extension cord can also help you reach the outlet if it’s located far from the unit.
Since bidet seats are idle most of the day and draw only minimal electricity, they’ll work just fine when connected to a shared bathroom circuit. As a result, you shouldn’t worry about creating a dedicated circuit for the unit.
On a shared circuit, you may see bathroom lights flicker when the bidet system is running.
10. Test Your Toilet Bidet Seat System
With the bidet seat in place, it’s time to test the system to see if it works as expected.
Get the Control Ready
Depending on the model, the unit may have a wireless remote or control panel attached to the side for operation.
Many bidet manufacturers that offer a wireless remote also provide a way to attach it to the wall. Wall mounting removes the risk of the remote dropping and breaking.
Turn on the Water
Turn on the water supply slowly as you check the lines for leaks. Turn off the water if you notice leaks in the connections. If there’re leaks, tighten the connections. Turn the water back on once you seal off the leaks.
Allow a few minutes for the toilet tank and the bidet reservoir to fill with water.
Switch on the Power
Turn on the power. Allow a few seconds for the bidet unit to boot up. If your bidet has a side control panel, the button should illuminate when the system is activated. If you have the remote, insert the batteries and switch it on.
Most bidet toilet seats have sensors that activate when you sit or place your hand on it. Be careful of splashing during bidet tests.
Select the Function You Want
Electric bidet seats have two ports that serve you. There’s the spray nozzle that extends out when activated to deliver water to the parts you want to clean. The nozzle retracts when you’re done cleaning.
The other port is for the air dryer. It blows out warm air to dry up the parts the bidet washed.
Bidet Spray Nozzle Settings
The spraying nozzle is the bidet’s primary cleaning tool. You can adjust the nozzle settings to achieve the best wash you want. Here’re a few ways to operate the spray nozzle:
- Most bidets allow you to extend the spray nozzle up to 5 different levels to get it to the right position. Depending on your model, you may oscillate the spray back and forth for a thorough cleanse.
- For a warm water wash, you can set your desired water temperature. Most bidets can warm water up to 40 degrees Celsius (104 degrees Fahrenheit).
- You can also adjust the pressure of the water coming out of the spray nozzle. You may set a gentle spray or a strong delivery.
Bidet Air Dryer Settings
If you have an electric bidet, you don’t need a towel to clean your rear after a wash. You can adjust the bidet dryer’s temperature just like water. Some models also allow you to adjust the warm air pressure.
Bidet Nightlight Settings
Many bidet seats have built-in nightlights. The lights illuminate the toilet seat, reducing the risk of accidents in a dimly lit bathroom. You can set the lights to turn on and off automatically depending on the light condition in the bathroom.
Modern bidet seats come with a heated seat feature. It can be ideal for toilet moments in the morning or during winter months.
The side panel or remote lets you operate and adjust your toilet seat bidet accordingly.
Final Thoughts
You now know how to install a toilet seat bidet. Remember to turn off the water supply before handling the hoses. If installing an electric bidet seat becomes tricky because of the power outlet position or other issues, consider seeking professional assistance.