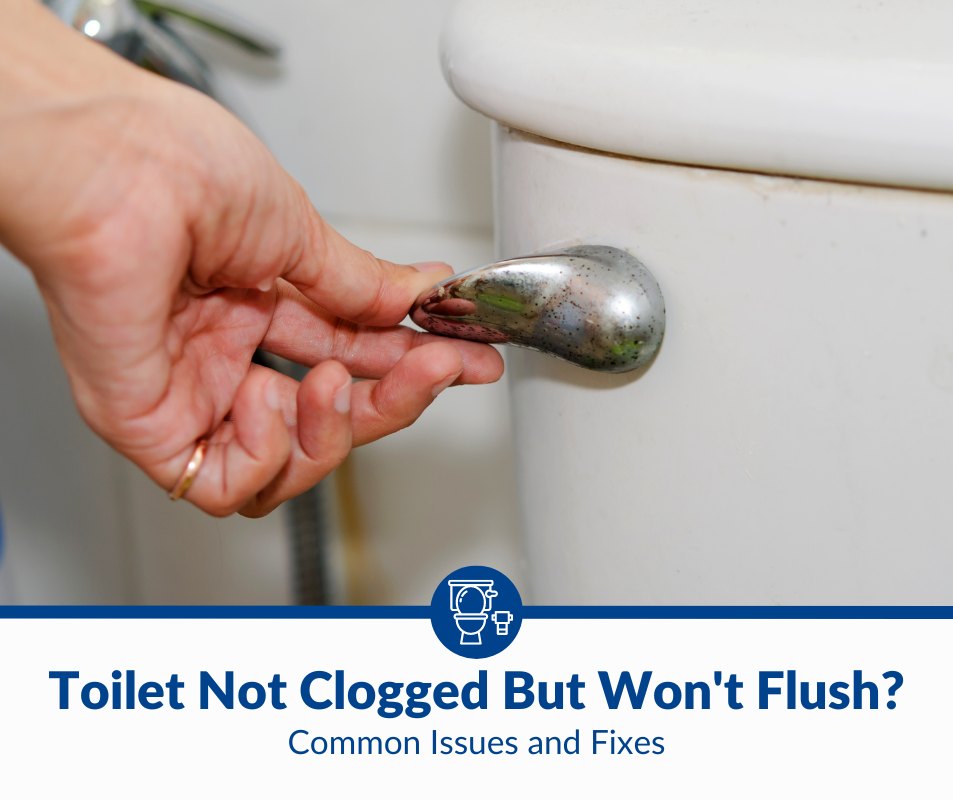
Toilet Not Clogged but Won’t Flush?: Common Issues and Fixes
Is your toilet taking more than one flush to remove all the waste from the bowl? You looked, and there are no signs of a clog despite not being clogged? What’s causing this problem, and should you call a professional plumber, or can you fix it yourself?
If the toilet isn’t clogged but won’t flush, check the siphon jet and rim holes for mineral deposits. The toilet also won’t flush if there isn’t sufficient water in the tank or the float is at the wrong height. Problems with the chain connecting the handle to the flapper can also cause this issue.
Today, I’ll cover various issues that cause your toilet to not flush properly, even if it doesn’t have any visible signs of a clog. I’ll also talk about how you can fix this problem so that your toilet has a strong water flow every time you use the flush. I’ll be going through each problem step by step so that you can find the source of the problem and apply the right solution to fix it.
1. There Isn’t Sufficient Water In the Tank
First, you need to check whether there are adequate volumes of water in the toilet tank.
The tank is the portion of the toilet that stores water and releases it to force human waste down the drain pipe. It is on the back of the toilet or behind the toilet seat when raised. Every toilet has a specific water level that ensures enough pressure when the water is released from the tank.
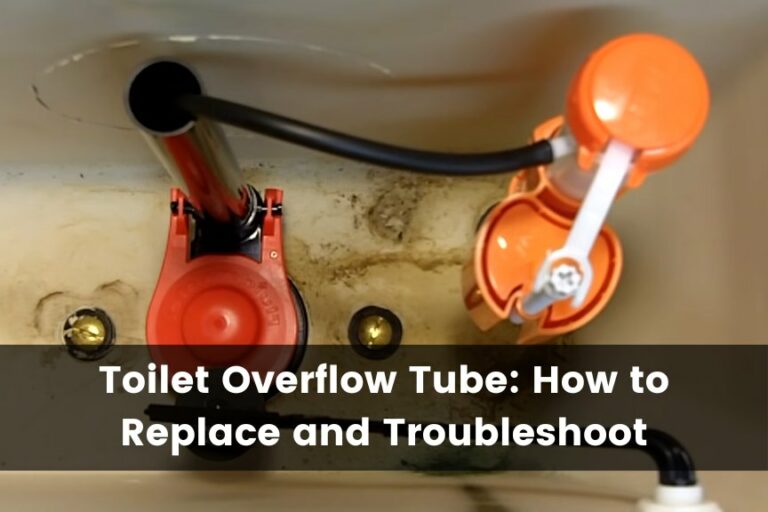
If it is too high, the tank has an overflow tube that removes excess water. This is why some toilets leak, i.e., you notice that water keeps flowing down the toilet even though you didn’t push the handle down.
The water won’t have the necessary pressure to push the human waste through the drain pipe if it is too low. As a result, you’ll have to flush multiple times before the toilet bowl is clear.
How To Fix?
You need to check the water level in the toilet’s tank to understand if this is the issue in your bathroom. Here’s a simple guide on identifying this problem and fixing it as soon as possible.
- Remove the lid of the toilet’s tank and keep it aside. Make sure you place it in a safe area, as you don’t want to damage it accidentally.
- Look at the water level inside the tank. If you have an older toilet, there may be markings or stains on the wall indicating the original level.
- Push the handle and start the flush process. Does the water reach the original level, or is it lower than usual?
As highlighted earlier, every tank will have an overflow tube. Generally, the water level will be ½ – 1 inch (1.27-2.54 cm) lower than the overflow tube. After you’ve flushed the toilet, is the water in the tank at this level?
If it is much lower (greater than ½ – 1 inch (1.27-2.54 cm) from the overflow tube), then your toilet doesn’t flush as well because of the water level.
To fix this problem, start by locating the float. For the uninitiated, the float is a device that tells the toilet how much water to fill in the tank. It is also responsible for stopping the tank from releasing water after it releases a specific volume.
The type of float your toilet uses depends on its brand and make. Regardless of the float type, you should look for a small screw on its body. Tightening or loosening this screw will change the water level inside the tank.
Make sure you tighten the screw to raise the volume of water until it is at least ½ – 1 inch (1.27-2.54 cm) away from the overflow tube. This will fix your problem if the toilet isn’t flushing due to insufficient water level in the tank.
2, The Toilet Flapper Is Damaged or Isn’t Working Properly
You next need to look at the flapper if you’ve determined that the toilet isn’t flushing due to the lack of sufficient water in the tank. This is connected to the handle of the tank via a chain. The role of the toilet flapper is to allow water to move from the tank to the bowl.
This part is at the bottom of the tank and is made from materials like rubber. When you push the handle, the flapper lifts up. Once the float determines that adequate water has reached the bowl, it will close the flapper.
For new toilets, there shouldn’t be any problem with the flapper. However, it can get damaged on older toilets. This can be due to mineral deposits below the flapper, which change its shape and affects the water flow while flushing. It can get damaged if you used harsh chemicals in the tank in the past.
Also, if the chain has too much slack, i.e., it isn’t tight enough, it won’t have the strength to pull up the flapper completely. This reduces the water flow, decreasing the effectiveness of the flush. Similarly, if it is too tight, i.e., it gets stuck somewhere when you flush, it won’t close properly, and you’ll end up with a leaky toilet.
How To Fix?
- You need to check whether the flapper has an issue. Follow these steps to test this part of the toilet.
- Take the lid from the toilet’s tank and find the flapper at the bottom.
- Push the handle down to simulate a flush.
Does the flapper have any deformities, or does the chain look too loose or tight when you use the handle?
If the flapper is deformed, you’ll need to change it immediately. However, you need to determine whether it is due to mineral deposits or harsh chemicals. Lift up the flapper and check for hard deposits. If it is because of the mineral deposits, then you’ll need to change the flapper frequently. Otherwise, you’ll have to find a way to reduce the water hardness in your bathroom.
When there are deposits under the flapper, you must remove them as soon as possible. Use an old toothbrush or any other similar items to scrape the deposits. Be careful if you’re using harder materials like a wire brush, stainless steel sponge, or metal foam. Too much pressure can leave scratch marks inside the tank.
If there aren’t any problems with the flapper but with the chain, you need to make appropriate adjustments to its length. It shouldn’t be extremely loose as it prevents the chain from lifting up the flapper and allowing the water to drain from the tank. This will reduce the water flow and render the flush ineffective.
You can use a paper clip or any other object to reduce the slack.
At the same time, you should ensure it isn’t too tight. This increases the tension on the chain and can snap over time. The amount of leeway you should give the chain must ensure enough pressure to lift the flapper without putting too much strain on the chain.
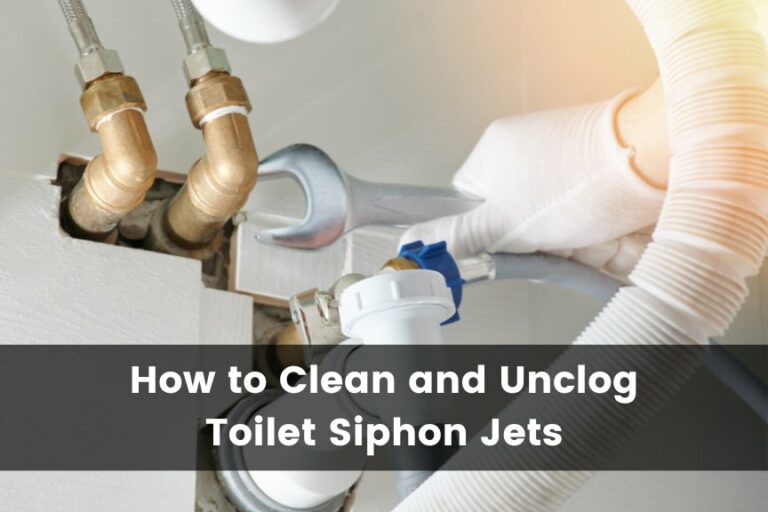
3. There Are Deposits in the Siphon Jet and Rim Jets
The siphon jet and rim jets are essential parts of any toilet. They allow water to flow through them and push the human waste toward the drainage pipe.
These openings may be blocked if you live in an area that receives hard water. Hard water leaves deposits, which reduce the flow of water. With time, it can cause complete blockage, reducing the efficiency of the flush. This may explain why you’ve to use the flush multiple times to get rid of human waste once.
How To Fix
You need to determine whether the problem is due to the siphon and rim jets, not other toilet components. The siphon jet is located at the bottom of the bowl, away from the drainage pipe.
If you look at the bottom of the toilet bowl closely, you’ll notice an opening. This is known as the siphon jet. There are two ways you can check for a blockage. One is to wear a pair of latex gloves and put your hand into the hole. If you feel hard deposits in this opening, it’s an indicator of hard water, and you need to clean it. The second option is to use a mirror and look at the siphon jet from a distance.
Remember, not every toilet has a siphon jet, so your experience can be different.
You also have to look at the rim jets located below where you sit on the toilet. As it can be hard to see, you should use a mirror. Place it in such a way that you can view the rim jets. If you notice that it isn’t clear, i.e., something is blocking the pathway, you need to clean it.
Here’s how you can remove deposits from the siphon and rim jets.
- Find the pipe which supplies water to the toilet and close the valve. You need to ensure there is no water entering the toilet.
- Use the handle to flush the remaining water from the toilet. Both the tank and the bowl should be empty.
- Cover the rim jets using duct tape or painter’s tape. I prefer painter’s tape as it has a strong adhesive and is easy to use. The role of the tape is to prevent all fluids from leaving the rim jets. Otherwise, the solution I suggest will be ineffective.
- Once you’ve covered the rim jets, make the following solution. Mix two parts of vinegar and one part of baking soda in a bucket.
- Pour the solution you’ve created into the overflow tube. If it doesn’t fill the toilet bowl, you should add your solution directly. Make sure the siphon jet is full of this solution.
- You should wait for at least an hour for the solution to work. I recommend leaving this solution overnight if you have the time (and another bathroom you can use).
Once the solution dissolves some of the deposits and loosens the rest, you can remove them from the siphon and rim jets. I’ll go through various techniques for this process.
Follow this method if you don’t mind getting your hands dirty. This involves using an old toothbrush, a toilet brush, or a thin metal wire. You can also use a flathead screw for this job, but you’ll have to sanitize it before you use it for other projects.
- Put on your pair of latex gloves, and using any tool of your choice, start scrubbing away at the deposits in the siphon jet. You’ll see particles come out of this opening and settle in the bowl. Continue with this process until you can’t feel any deposits in the siphon jet.
- Remove the tape from the rim jets.
- Again, with the help of any tool, scrub the openings and remove all deposits.
- Open the water supply and allow the toilet’s tank to fill up.
- Use the handle and flush.
This will fix the issue of the flush not working as intended. If you’ve followed the above advice and still notice deposits in the siphon and rim jets, you need to use a stronger toilet cleaner solution.
I recommend using an industrial-strength toilet cleaner like CLR Calcium, Lime & Rust Remover and Cleaner. It is safe to use on porcelain, a common building material for toilets. Also, it doesn’t use harsh chemicals, so you won’t have to worry about damaging your toilet.
You need to follow a similar process as the steps highlighted above. Only replace the vinegar and baking soda solution with CLR Calcium, Lime & Rust Remover.
4. The Toilet’s Fill Valve Is Damaged or Corroded
Another essential part of the toilet is the fill valve. It is responsible for filling up the tank with water. Connected to the main water line, it ensures sufficient water for the next flush.
One thing to remember is that this won’t be a problem with new toilets. It is usually the case with older toilets as it takes time for this component to suffer from significant damage. Cracks can start appearing in the housing, or corrosion can occur. As a result, it cannot regulate the flow of water inside the tank.
How To Fix?
Like every other solution I’ve suggested, you need to remove the lid from the tank. Flush the toilet using the handle and observe the fill valve. If it makes funny noises or the water level doesn’t reach the desired height, you may need to replace the fill valve despite tinkering with the float.
You can get a new fill valve from a hardware store and replace it yourself. You should contact a professional plumber if you’re comfortable taking apart the fill valve.
5. The Drain Pipe Is Damaged, or the Design Is Bad
If you’ve tried all the above solutions and still the toilet won’t flush properly, there’s a high chance it is because of the drain pipe. As the name suggests, the drain pipe is the one that will remove all the human waste from the toilet when you flush it.
If there are cracks in the drain pipe, the flush can become ineffective. It can cause leaks and may leave a bad smell in your bathroom or surrounding areas. Also, if the waste isn’t pushed to the sewer line, it can pose a health risk.
A good drain pipe design is essential as it determines how efficiently your toilet eliminates waste. Generally, it has a downward slope for best results. This ensures the toilet can push away human waste into your house’s sewer line.
If there are problems with the drain pipe design, water cannot flow freely. It gets stuck somewhere in the pipe, which is why the flush won’t work properly.
How To Fix?
If it is a problem with the drain pipe, whether it has cracks in the piping or a bad design, you’ll need to get a professional plumber to look at the problem. If you or your friends know a reliable plumber, I recommend getting in touch with them as soon as possible.
While it is possible to fix it yourself, it requires a lot of technical knowledge about the plumbing system in your household. Also, if you don’t do it properly, it can further exasperate the problem, resulting in an expensive fix.
Note: The toilet in your bathroom may also not flush properly if it isn’t installed properly. If you’re facing this issue with a new toilet, ask a professional plumber to take a look.
Final Thoughts
If your toilet doesn’t flush, even though you can’t find any indicator or a clog in the system, you need to check each part individually. The common culprits for this problem are lack of water in the tank or mineral deposits in the siphon and rim jets.
If there is insufficient water, you can tinker with the float to increase the fluid level in the tank. For mineral deposits in the siphon and rim jets, use a descaler solution like vinegar, baking soda, or any other commercial product.