Toilet Overflow Tube: How To Replace and Troubleshoot
The toilet overflow tube is an essential toilet component that prevents the tank from running continuously. If your toilet overflow tube isn’t working as it should, you’ll have to deal with water overflow and other problems. So, how do you troubleshoot and replace an overflow tube?
When replacing a toilet overflow tube, ensure the new one is the right size and compatible with the flush valve. You’ll have to shut off the water supply, drain the tank, replace the old tube with a new one, and connect it to the flush valve. In the end, you’ll have to reassemble the tank.
In this article, I’ll discuss the signs that indicate that your overflow tube isn’t working and the process of replacing it properly. I’ll also discuss how to fix a misaligned overflow tube and when you don’t need to replace it.
1. Locate the Overflow Tube System
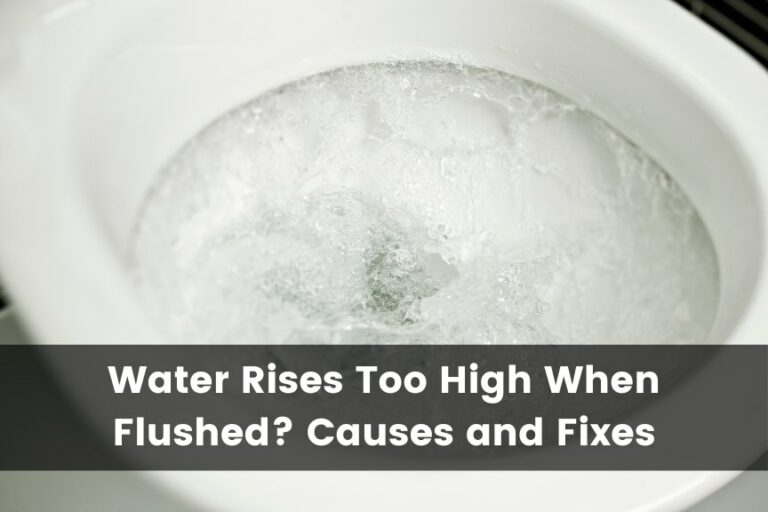
Overflowing water is one of the most common toilet problems and can be quite irritating. If your toilet is constantly overflowing, you’ll have to fix the problem as soon as possible to prevent flooding since this could potentially cause structural damage.
Most modern toilets already have an overflow tube installed, reducing the risk of a running toilet.
What Does the Overflow Tube Look Like?
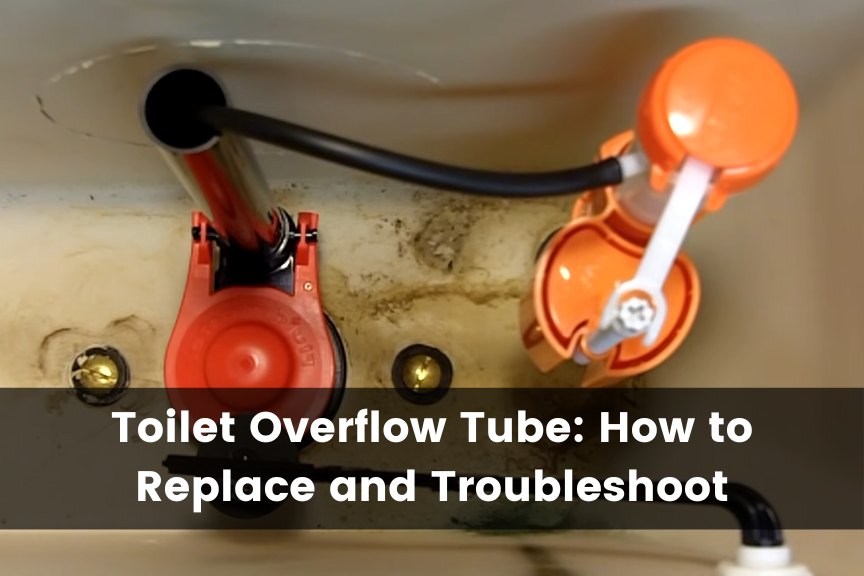
A toilet overflow tube is a small, cylindrical tube that sits directly in the middle of the tank. It’s usually made from brass or something similar. The water level should be below the top of the tube, and when it overflows, that’s when the problems start.
How Does the Overflow Tube Work?
An overflow tube directs any overflowing water toward the toilet bowl, preventing the tank from overflowing.
Similarly, if the flush system doesn’t work properly or the fill valve doesn’t turn off, the overflow tube will send the water into the toilet bowl.
The overflow tube also plays a role during the toilet tank refill cycle. The flushing system initiates when you press the flush lever, which will pull the chain to open the flush valve. As this happens, the water in the toilet tank lowers as it goes into the toilet bowl.
After this, the tank quickly starts to refill. Sometimes, the water from the fill valve goes into the refill tube and moves to the overflow tube. The function of the overflow tube as a water regulating channel is to send this refilled water into the bowl.
How To Locate the Overflow Tube
Most of the mechanical parts of the toilet are placed within the tank, hiding unsightly parts and keeping the system regulated.
The overflow tube is also placed inside the toilet tank.
To locate the tube:
- Remove the lid of the toilet tank. There you’ll find multiple mechanical components.
- Look at the center of the toilet tank. You’ll find a hollow and vertical tube fastened to the flush valve.
- Confirm that you’ve found the overflow tube by checking its dimensions. It should be about 1 inch (2.54 cm).
2. Check What’s Causing Overflow Tube Problems
Fixing a toilet is a relatively easy task, but when it comes to an overflowing water problem, you can fix it only if you have some plumbing experience. If not, it is better to call a plumber, or you might cause more damage to your toilet and pay more to fix it in the long run.
However, you can identify the causes behind the overflow tube problem by yourself. Here are some signs that indicate that your overflow tube is not working properly:
The Water Level Inside the Toilet Tank Is Too High
The water level inside that tank shouldn’t be too high. If the water level is too high or close to the tank’s top, the overflow tube may not work properly.
The overflow tube may malfunction in this case because the water that fills the tank can enter the tube, stopping it from regulating the water levels.
The optimal water level in the toilet tank is when the tank water is below the overflow tube and fill valve. In this way, the water won’t flow out of the toilet tank, and you won’t have any mess to clean up from the flow.
If the water is always below the overflow tube, it won’t go through it, and the tube will not get damaged. To ensure that water isn’t running inside the overflow tub, remove the toilet’s lid and check the tube properly.
If the tank water is going inside the overflow tube, then you’ll have to lower the water level immediately. However, if the water level is high but not going inside the overflow tube, it’s a sign that the flush valve has a problem.
The water Level Inside the Toilet Tank Is Too Low
While a high water level causes overflow problems, low water levels can cause flush problems and even blockages.
If the water level inside the tank is too low, it won’t flush properly. In the worst-case scenario, the toilet may not flush at all. This could also mean that the overflow tube isn’t working because the water isn’t moving to the toilet bowl.
If your toilet isn’t flushing properly, have it checked by a professional, or you’ll have to deal with a blocked toilet.
Overflow Tube Is Too Short
It’s important to check that the overflow tube is compatible with your toilet. If the overflow tube is too short for your toilet, then the toilet will overflow, even when the tube is installed correctly.
When the overflow is too short for the toilet tank, then the tank water will flow through the overflow tube and disrupt the water balance in the flush tank. Never choose an overflow tube by estimating its size, as slight differences can cause problems. You’ll have to measure it properly to check whether it’s the perfect size for your toilet tank or not.
Use a measuring tape to measure the height of the overflow tube vertically. To do this, follow the steps below:
- Remove the tank lid.
- Drain out all the water in the tank.
- Remove the overflow tube from its fixed position and measure it.
If the overflow tube height is optimal, then the problem is with some other toilet component. However, if the overflow tube is too short, the only way to fix the problem is to replace it with a new overflow tube.
The Overflow Tube Is Damaged
The overflow tube of your toilet can get cracks in its base, especially if it is very old.
As a result, the toilet tank won’t refill with water after flushing, and water will continuously rush into the bowl.
Overflow tubes that are made of plastic usually undergo damage due to wear and tear over time. Tubes made from brass or other strong materials are less likely to suffer this damage.
If the overflow tube is actually damaged or broken at the base, then replacing it is the only solution.
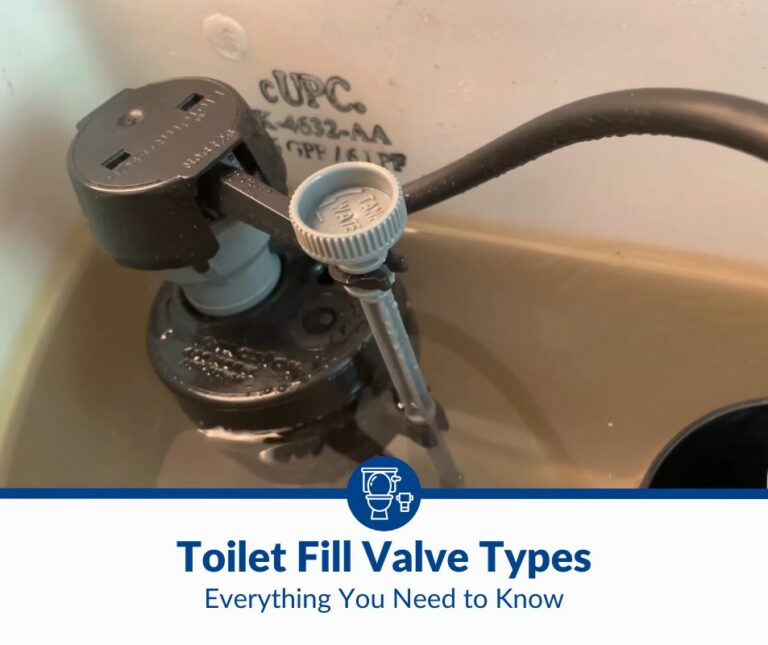
The Overflow Tube Is Not Connected to the Flush Valve Properly
The overflow tube of your toilet may not be working because it was not connected to the flush valve properly during installation. The tube may also get loose after a while, causing overflow problems.
If that’s the case, you don’t have to replace the overflow tube. All you need to do is fasten it to the flush valve properly, and the water won’t spill over.
The flush valve and overflow tube may also be incompatible parts, causing the overflow tube to come loose.
So, even if the overflow tube is connected properly to the flush valve, make sure that both of these components are compatible with each other.
- Fix a Misaligned Toilet Overflow Tube
Regular inspection of your toilet is essential to ensure the overflow tube hasn’t come loose and is in the correct position.
If the overflow tube isn’t aligned properly, is not in a vertical position, or is not connected to the flush valve, it won’t regulate the water level within the toilet tank. If you notice any of these problems, you can fix the overflow tube without replacing it.
How To Fix
To fix a misaligned overflow tube:
- Take off the lid of the toilet tank.
- Drain the tank properly and make sure there is no water left within it.
- Inspect the overflow tube carefully. If the overflow tube isn’t connected properly to the flush valve, then fasten both components together properly with a screwdriver.
If the overflow tub is not fully vertical and sits in a leaning position, you can fix the problem simply by adjusting it with your hands. Hold the overflow tube and stabilize it in a vertical position. Make sure that the tube is stable enough so that it doesn’t fall into a leaning position again.
If your toilet has a plastic overflow tube, then don’t grab it too tightly. If the plastic overflow tube has a bend on its surface, then you don’t have to replace the entire tube. Just grab the bent area and squeeze it tightly, the overflow tube will straighten up, and the bent will go away.
If the overflow tube is placed too high during installation, your toilet will overflow. Make sure that the overflow tube is placed at the right height above the bottom hole of the toilet tank.
It should also be aligned properly with the rest of the components within the toilet tank. You’ll have to use a hacksaw to fix the alignment of the overflow tube. Simply cut the tube length above the water level and reinstall the tube.
If you’re worried that you might damage the overflow tube with a hacksaw, it’s best that you call a plumber to get the job done.
- Shut Off the Toilet’s Water Supply
Before fixing any problem with your toilet, always shut off the water toilet’s water supply first. To shut off the toilet’s water supply, you’ll first have to locate the shut-off valve.
The shut-off valve is usually attached to the pipe behind the toilet. One end of this pipe will be attached to the bottom of the toilet, while the other end will be attached to the wall behind the toilet.
Here’s how to do it:
- To completely cut the water supply to the toilet, turn the knob of the shut-off valve in a clockwise direction until you can’t turn it anymore. Don’t apply too much pressure on the knob while turning it, or the washer may get damaged.
- If the valve is rusty and you struggle to turn it, apply rust removal lubricant. If that doesn’t work, you’ll have to replace the shut-off valve. If you have a very old toilet without a shut-off valve, then you’ll have to turn off the water supply to the entire house to fix your toilet problem.
4. Drain the Tank
After shutting off the toilet’s water connection, you can proceed to drain the tank.
- Simply press the flush lever for a few seconds to drain the toilet tank completely.
- When the water from the tank is drained, wait for a moment.
- If the tank doesn’t refill, it means that the water supply is completely shut off, and you can remove the lid of the tank.
- Look inside the toilet tank and see if there is any water left at the bottom.
- Use a sponge or a towel to wipe the water from the bottom of the tank and dry it completely. Now, squeeze the towel or sponge above the bowl to get rid of the water.
- You’ll have to repeat this process 3 to 5 times. After that, your tank will be completely empty.
You can also use a suction gun to drain the toilet tank if the draining mechanism doesn’t work properly. To do so:
- Place the suction gun inside the tank.
- Pull the lever and then place the suction gun above a bucket.
- Push the lever to empty the water inside the bucket.
- Remove the Bolt Holding the Tube in Place
To remove the overflow tube, you’ll first have to detach the water supply tube from the bottom of the toilet tank. Follow these steps to do so:
- Use pliers to remove the extension nut.
- Once the extension nut is loose, remove the water supply line underneath the fill valve.
- After that, you’ll have to disconnect other components like the water-fill hose, rubber gasket, and chain from the lever rod.
- Now, use a screwdriver to remove the overflow tube.
- Remove the bolts at the bottom of the tank that attaches to the overflow tube.
- Take the tube out of the tank.
- Replace the Overflow Tube
You can fix the new overflow tube in place of the old one. Make sure that the overflow tube is of the appropriate height and diameter.
The size of the overflow tube depends on the size of the toilet tank. Measure the size of your toilet tank, and when you go to buy an overflow tube from a plumbing store, discuss the optimal size of the overflow tube with a store clerk.
Here is a YouTube video showing how to replace the overflow tube:
- Reassemble the Toilet Tank
When you’ve replaced the overflow tube with a new one, reassemble all the components within the tank. Make sure you fasten all the parts properly in the right place.
Lastly, place the tank lid back in place and turn on the water supply. Flush the toilet and refill it to check if the problem is solved.
Can an Overflowing Toilet Cause Water Damage?
If your toilet overflow tube isn’t working the way it should, you might wonder what will happen once the water starts leaking out. Will the water cause any real structural damage?
An overflowing toilet can cause water damage if there is a lot of water. Water pooling on the floor can cause structuring damage to the floor (and possibly the ceiling if there’s a room beneath it), and it could even damage the grout between your bathroom tiles.
Grouted tiling will be affected by constant running water from your overflowing toilet; it will eventually come loose and make your tiles unstable. If left unattended, you could be left with a hefty bill to regrout your bathroom floor.
On the other hand, if you clean up the mess quickly and get your toilet fixed as soon as you notice a problem, you shouldn’t have to worry about structural damage.
Final Thoughts
If your toilet tank is overflowing, it may be due to a faulty overflow tube. While you can adjust the tube in place, you’ll have to replace the overflow tube if it’s cracked or damaged.
Replacing an overflow tube is easy, but you’ll need a replacement part compatible with your toilet. If you struggle to replace the tube or the toilet tank still overflows even with the new tube, call a plumber to check what’s causing the problem.
If you’re worried about water damage, contact a professional as soon as you notice a problem with your toilet.