Weak Flushing Toilet? How To Make a Toilet Flush Better
If you’re dealing with a weak flushing toilet, you know how frustrating it can be to try and get rid of waste with just a faint swirl of water. Fortunately, you can take some simple steps to improve your toilet’s flushing power and keep it functioning correctly.
If you have a weak flushing toilet, you can fix it by fixing or replacing faulty flapper valves, checking the flush handle and float, clearing clogs in the trap and rim jets, or adjusting the water level. If this doesn’t work, you may need to call a professional to repair or replace the toilet.
The rest of this article will give you detailed instructions on making a weak flushing toilet flush better. Read on to learn what to do in each situation and how to get your toilet functioning properly again.
1. Fix or Replace Faulty Flapper Valve
One common cause of weak flushing is a faulty flapper valve, which is responsible for releasing water from the toilet tank into the bowl when the toilet is flushed. If the flapper valve is not functioning correctly, it can cause the toilet to flush weakly.
The flapper valve is located at the bottom of the toilet tank and is typically made of rubber or silicone. It is attached to a chain or rod connected to the flush handle. When the flush handle is pulled, the chain or rod lifts the flapper valve, allowing water to flow from the tank into the bowl. Once the tank is emptied, the flapper valve falls back into place, sealing the opening and preventing water from flowing.
If the flapper valve is not sealing correctly, it can cause the toilet to flush weakly. This can be due to various factors, such as:
- Worn-out flapper valve: Over time, the flapper valve can become worn out and no longer seal properly. This is especially common if the flapper valve is made of rubber, as rubber tends to degrade over time.
- Incorrectly adjusted flapper valve: The flapper valve may not be adjusted appropriately, which can cause it to leak water into the bowl even when the toilet is not being used.
- Debris stuck in the flapper valve: If debris, such as hard water deposits or bits of toilet paper, gets stuck in the flapper valve, it can prevent it from sealing correctly.
- Corroded or damaged flush handle: If the flush handle is corroded or damaged, it can cause the flapper valve to not function properly.
To fix a weak flushing toilet caused by a faulty flapper valve, try the following steps:
- Adjust the flapper valve: If the flapper valve is not sealing correctly, you can try adjusting it to see if that helps. Locate the adjustment point on the flapper valve to adjust it. This is typically a small, raised tab or clip that can be moved up or down to adjust the height of the flapper valve. If the flapper valve is too low, it may not seal properly. If it is too high, it may not lift far enough when the flush handle is pulled.
- Clean the flapper valve: If debris is stuck in it, it can prevent it from sealing correctly. To clean the flapper valve, remove it from the toilet tank and rinse it with water. Be sure to remove any debris that is stuck in the valve.
- Replace the flapper valve: If it is worn out or damaged, you may need to replace it. To do this, you will need to purchase a new flapper valve and follow the instructions below for installation. Choosing a flapper valve compatible with your toilet is important, as using the wrong type of valve can cause further issues.
Replacing the Flapper Valve
Here is a step-by-step guide on how to install a new flapper valve:
- Shut off the water supply: Before you begin, it is important to turn off the water supply to the toilet. This will prevent any water from flowing into the tank while you are working on it. Locate the valve on the water supply line that runs from the wall to the toilet to shut off the water supply. Turn the valve clockwise to close it.
- Flush the toilet and remove the remaining water: After you have shut off the water supply, remove water from the tank by flushing it. If water remains in the tank, use an absorbent towel or sponge to mop it up.
- Remove the old flapper valve: You will need to locate the attachment points to remove the old one. These are typically small clips or tabs holding the flapper valve. Gently lift the flapper valve to release it from the attachment points and remove it from the tank.
- Clean the flapper valve opening: Before installing the new one, you should clean the opening to ensure it is free of debris or buildup. Use a small brush or scrubber to scrub the inside of the opening and then rinse it with water.
- Install the new flapper valve: To install the new flapper valve, place it in the opening at the bottom of the tank. Ensure the flapper valve is appropriately aligned and seated in the opening. Attach the flapper valve to the attachment points using the clips or tabs provided.
- Adjust the flapper valve: After installing the new one, you may need to adjust it to seal correctly. To do this, locate the adjustment point on the flapper valve. This is typically a small, raised tab or clip that can be moved up or down to adjust the height of the flapper valve. If the flapper valve is too low, it may not seal properly. If it is too high, it may not lift far enough when the flush handle is pulled.
- Turn the water supply back on: Once you have installed and adjusted the new flapper valve, it is time to turn the water supply back on. Locate the water supply valve and turn it counterclockwise to open it. Allow the tank to refill, and then flush the toilet to test the new flapper valve.
2. Check the Flush Handle
While there are many other potential causes of weak flushing, one that is often overlooked is the flush handle. The flush handle is the lever or button you push to initiate the flushing process. If it is not functioning correctly, it can cause the toilet to flush weakly or not at all.
There are several ways in which the flush handle can cause a weak flushing toilet. Here are a few potential causes:
- Corroded or damaged flush handle: Over time, the flush handle can become corroded or damaged, which can cause it to malfunction. If the flush handle is corroded, it may not lift the flapper valve properly, resulting in a weak flush. Similarly, if the flush handle is damaged, it may not be able to lift the flapper valve at all, causing the toilet not to flush at all.
- Incorrectly adjusted flush handle: The flush handle may not be adjusted appropriately, causing it to lift the flapper valve too high or too low. If the flush handle is not adjusted correctly, it can cause the toilet to flush weakly or not at all.
- Loose or disconnected flush handle: If the flush handle is loose or disconnected from the flapper valve, it will not be able to lift the flapper valve and initiate the flushing process. When this happens, the toilet might not flush effectively or not at all.
To fix a weak flushing toilet caused by a faulty flush handle, you can try the following steps:
- Check for corrosion or damage: If the flush handle is corroded or damaged, it may need to be replaced. To check for corrosion or damage, inspect the flush handle for any visible signs of wear and tear. If the handle is corroded or damaged, you will need to purchase a new one.
- Adjust the flush handle: If the flush handle is not adjusted correctly, it can cause the toilet to flush weakly or not at all. Adjust by locating the adjustment point on the handle. This is typically a small, raised tab or clip that can be moved up or down to adjust the height of the handle. If the handle is too low, it may not lift the flapper valve properly. If it is too high, it may lift the flapper valve too far, causing the toilet to flush too aggressively.
- Tighten the flush handle: If the flush handle is loose or disconnected, it will not be able to lift the flapper valve and initiate the flushing process. To fix this problem, you will need to tighten the flush handle. Locate the mounting nut that holds the handle in place and tighten it using a wrench. If the mounting nut is stripped or damaged, you may need to replace it.
- Check the chain or rod: The flush handle is connected to the flapper valve via a chain or rod. If this chain or rod is too long or too short, it can cause the toilet to flush weakly. You will need to adjust the chain length or rod length to fix this problem. Locate the attachment point on the chain or rod and move it up or down to adjust the length.
Replacing the Flush Handle
Here is a step-by-step guide on how to replace a flush handle:
- Shut off the water supply: Before you begin, it is important to turn off the water supply to the toilet. This will prevent any water from flowing into the tank while you are working on it. Locate the valve on the water supply line that runs from the wall to the toilet to shut off the water supply. Turn the valve clockwise to close it.
- Flush the toilet and remove the remaining water: After you have shut off the water supply, remove water from the tank by flushing it. Use a sponge or towel to soak up any remaining water in the tank.
- Remove the old flush handle: To remove the old one, you will need to locate the mounting nut that holds it in place. This nut is typically located under the tank lid and can be accessed by lifting the lid. Use a wrench to loosen the mounting nut, and gently lift the flush handle to remove it from the tank.
- Install the new flush handle: To install the new flush handle, align it with the mounting hole in the tank and attach it using the mounting nut that came with the new handle. Use a wrench to tighten the mounting nut and secure the flush handle.
- Adjust the flush handle: You may need to adjust the handle to ensure that it is lifting the flapper valve properly. Locate the adjustment point on the handle. This is typically a small, raised tab or clip that can be moved up or down to adjust the height of the handle. If the handle is too low, it may not lift the flapper valve properly. If it is too high, it may lift the flapper valve too far, causing the toilet to flush too aggressively.
- Turn the water supply back on: Once you have installed and adjusted the new flush handle, it is time to turn the water supply back on. Locate the water supply valve and turn it counterclockwise to open it. Allow the tank to refill, and then flush the toilet to test the new flush handle.
3. Check the Float
The float is a small, buoyant device in the toilet tank that regulates the water level. If the float is not functioning correctly, it can cause the toilet to flush weakly or not at all.
There are several ways in which the float can cause a weak flushing toilet. Here are a few potential causes:
- Stuck float: If the float becomes stuck in the toilet tank, it can prevent water flow, causing the toilet to flush weakly. The float can become stuck if it is too large or obstructed by debris, such as bits of toilet paper or hard water deposits.
- Incorrectly adjusted float: The float may not be adjusted appropriately, which can cause it to allow too much or too little water into the tank. If the float is set too low, it may not allow enough water into the tank, resulting in a weak flush. If set too high, it may allow too much water into the tank, causing the toilet to flush too aggressively.
- Worn-out float: Over time, the float can become worn out or damaged, which can cause it to malfunction. If the float is worn out or damaged, it may not be able to regulate the water level properly, causing the toilet to flush weakly or not at all.
To fix a weak flushing toilet caused by a faulty float, you can try the following steps:
- Check for a stuck float: If the float becomes stuck in the toilet tank, it can prevent water flow into the tank, causing the toilet to flush weakly. To check for a stuck float, lift the tank lid and inspect the float for any signs of obstruction. If the float is stuck, gently move it to release it.
- Adjust the float: If the float is not adjusted correctly, it can cause the toilet to flush weakly. Adjust by locating the adjustment point on the float. This is a small, raised tab or clip that can be moved up or down to adjust the height of the float. If the float is set too low, it may not allow enough water into the tank, resulting in a weak flush. If set too high, it may allow too much water into the tank, causing the toilet to flush too aggressively.
- Replace the float: Worn-out or damaged floats will eventually need to be replaced. If the float is worn out or damaged, it may not be able to regulate the water level properly, causing the toilet to flush weakly or not at all.
Replacing a Faulty Fault
You will need to replace the flapper valve if it is cracked, warped, or malfunctioning. Purchase a new float that is compatible with your toilet, and then follow the step-by-step guide below on how to replace a faulty float:
- Shut off the water supply: Before you begin, it is important to turn off the water supply to the toilet. This will prevent any water from flowing into the tank while you are working on it. Locate the valve on the water supply line that runs from the wall to the toilet to shut off the water supply. Turn the valve clockwise to close it.
- Flush the toilet and remove the remaining water: After you have shut off the water supply, remove water from the tank by flushing it. Use a sponge or towel to soak up any remaining water in the tank.
- Remove the old float: Locate the mounting point on the float to remove the old float. This is typically a small, raised tab or clip that holds the float. Gently lift the float to release it from the mounting point and remove it from the tank.
- Install the new float: To install the new float, place it in the tank and align it with the mounting point. Attach the float to the mounting point using the clip or tab provided.
- Adjust the float: After installing the new float, you may need to adjust it to ensure that it appropriately regulates the tank’s water level. To adjust the float, locate the adjustment point on the float. This is typically a small, raised tab or clip that can be moved up or down to adjust the height of the float. Ensure that the float is set at the correct height to allow enough water into the tank but not too much.
- Turn on the water supply: Once you have adjusted the float, turn the water supply back on. Flush the toilet a few times to ensure it is flushing correctly and that there are no leaks in the tank.
4. Clear Clog in the Trap
The trap is a curved pipe located under the toilet bowl that prevents sewage gases from entering the bathroom. If the trap becomes clogged, it can cause the toilet to flush weakly or not at all.
There are several ways in which a clog in the trap can cause a weak flushing toilet. Here are a few potential causes:
- Foreign objects: Foreign objects, such as toilet paper, feminine hygiene products, or small toys, can become stuck in the trap and cause a clog. A severe clog can block the flow of water through the trap and cause the toilet to flush weakly or not at all.
- Hard water deposits: Hard water deposits can build up in the trap and cause a clog. These deposits are formed when hard water (water with a high mineral content) flows through the pipes and leaves behind a buildup of minerals.
To fix a weak flushing toilet caused by a clog in the trap, you can try the following steps:
- Use a plunger: If the clog is not too severe, remove it using a plunger. This involves placing it securely over the toilet bowl’s bottom opening and pressing the plunger down all the way. Do this until you manage to remove the clog.
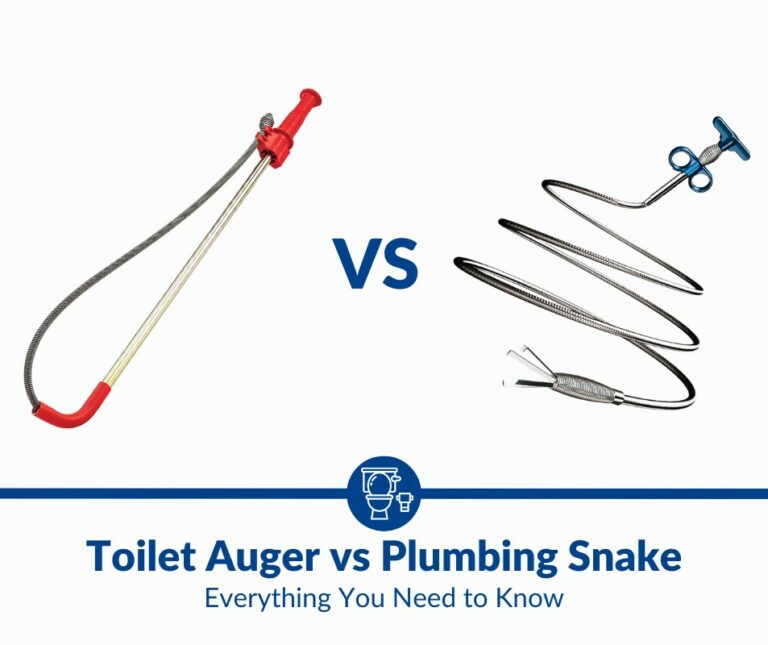
- Use a toilet auger: If the plunger does not work, you can try using a toilet auger. This long, flexible tool with an auger at the end is designed to remove clogs from toilets. Using an auger involves threading it into the opening at the lower part of the bowl and then gently pushing it through the trap. Slowly rotate the auger handle until you’ve removed the clog.
5. Raise the Water Level
The water level in the toilet tank is crucial for proper flushing, as it determines the amount of water released into the bowl during the flushing process. If the water level is too low, it can cause the toilet to flush weakly or not at all.
Several things can cause the water level in your toilet to drop, including:
- Incorrectly adjusted float. The float regulates water flow into the tank and is typically adjustable. If the float is too low, it will not allow enough water into the tank and can cause the toilet to flush weakly.
- Leaking fill valve: The fill valve is located in the toilet tank that controls water flow into the tank. If the fill valve is leaking, it can cause the water level in the tank to be too low, resulting in a weak flush.
- Obstructed water supply line: The water supply line carries water from the main water line to the toilet tank. If this pipe becomes blocked, it can cause the water level in the tank to be too low, resulting in a weak flush.
To fix a weak flushing toilet caused by a low water level, you can try the following steps:
- Adjust the float: If the float is not adjusted correctly, it can cause the water level in the tank to be too low, resulting in a weak flush. Locate the adjustment point on the float and adjust it accordingly.
- Replace the fill valve: If the fill valve is leaking, it can cause the water level in the tank to be too low, resulting in a weak flush. Replace the fill valve with a new one designed for your toilet model.
- Clear the water supply line: If the water supply line is obstructed, it can cause the water level in the tank to be too low, resulting in a weak flush. Locate the water supply line and clear any obstructions.
6. Unclog the Rim Jets
The rim jets are small holes located around the rim of the toilet bowl that allow water to flow into the bowl during the flushing process. If these jets become clogged, it can cause the toilet to flush weakly or not at all.
Foreign objects, such as toilet paper, feminine hygiene products, or small toys, can become stuck in the rim jets and cause a clog. If the clog is severe enough, it can block water flow through the jets and cause the toilet to flush weakly or not at all. Hard water deposits and debris in the water supply line can also cause the rim jets to become clogged.
To fix a weak flushing toilet caused by a clog in the rim jets, you can try the following steps:
- Use a toilet brush: Use a toilet brush to loosen debris stuck in the rim jets.
- Use a plumber’s snake: If the clog is more severe, you may need to use a plumber’s snake to loosen and remove the clog. Insert the snake into each rim jet until you feel the clog, then rotate the handle of the snake to loosen and remove the clog.
- Clear the water supply line: Hard water deposits and debris in the water supply line can also cause the rim jets to become clogged. Locate the water supply line and clear any debris blocking it.
7. Call a Professional
If you’ve tried the steps above and your toilet is still flushing weakly, it may be time to call a professional plumber. A clog or a problem with the plumbing system can be challenging to identify and fix without the right tools, so it’s best to have a professional assess the situation and provide the appropriate solution.
A plumber can identify problems with the plumbing system and provide the best solution to fix a weakly flushing toilet.
Conclusion
Your toilet needs to flush correctly for effective and efficient use. Weak flushing can be caused by various issues, including an improperly adjusted float, a leaking fill valve, an obstructed water supply line, or clogged rim jets.
Following the steps outlined above can help you fix a weak flushing toilet and make your toilet flush better. If the problem is more severe, it’s best to call a professional plumber for an accurate diagnosis and the best solution.